|
The Beginner's guide to RIFLESCOPE Chapter 1 Chapter 2 Chapter 3 The Beginner's guide to NIGHT VISION Chapter 1 Chapter 2 The Beginner's guide to BINOCULARS Chapter 1 Chapter 2 What Type of Binoculars Do I Need? Chapter 3 Chapter 4 Chapter 5 |
CHAPTER 1: INTRODUCTION TO RIFLE SCOPESSo you’ve finally decided to put a scope on your rifle. You start to browse the internet trying to figure out what kind of sight or scope you want to get and the next thing you know, you’re left more confused than before. If this is you right now, don’t worry, in this first chapter of our Beginner’s Guide to Rifle Scopes, we will arm you with the correct info to make the right decision. 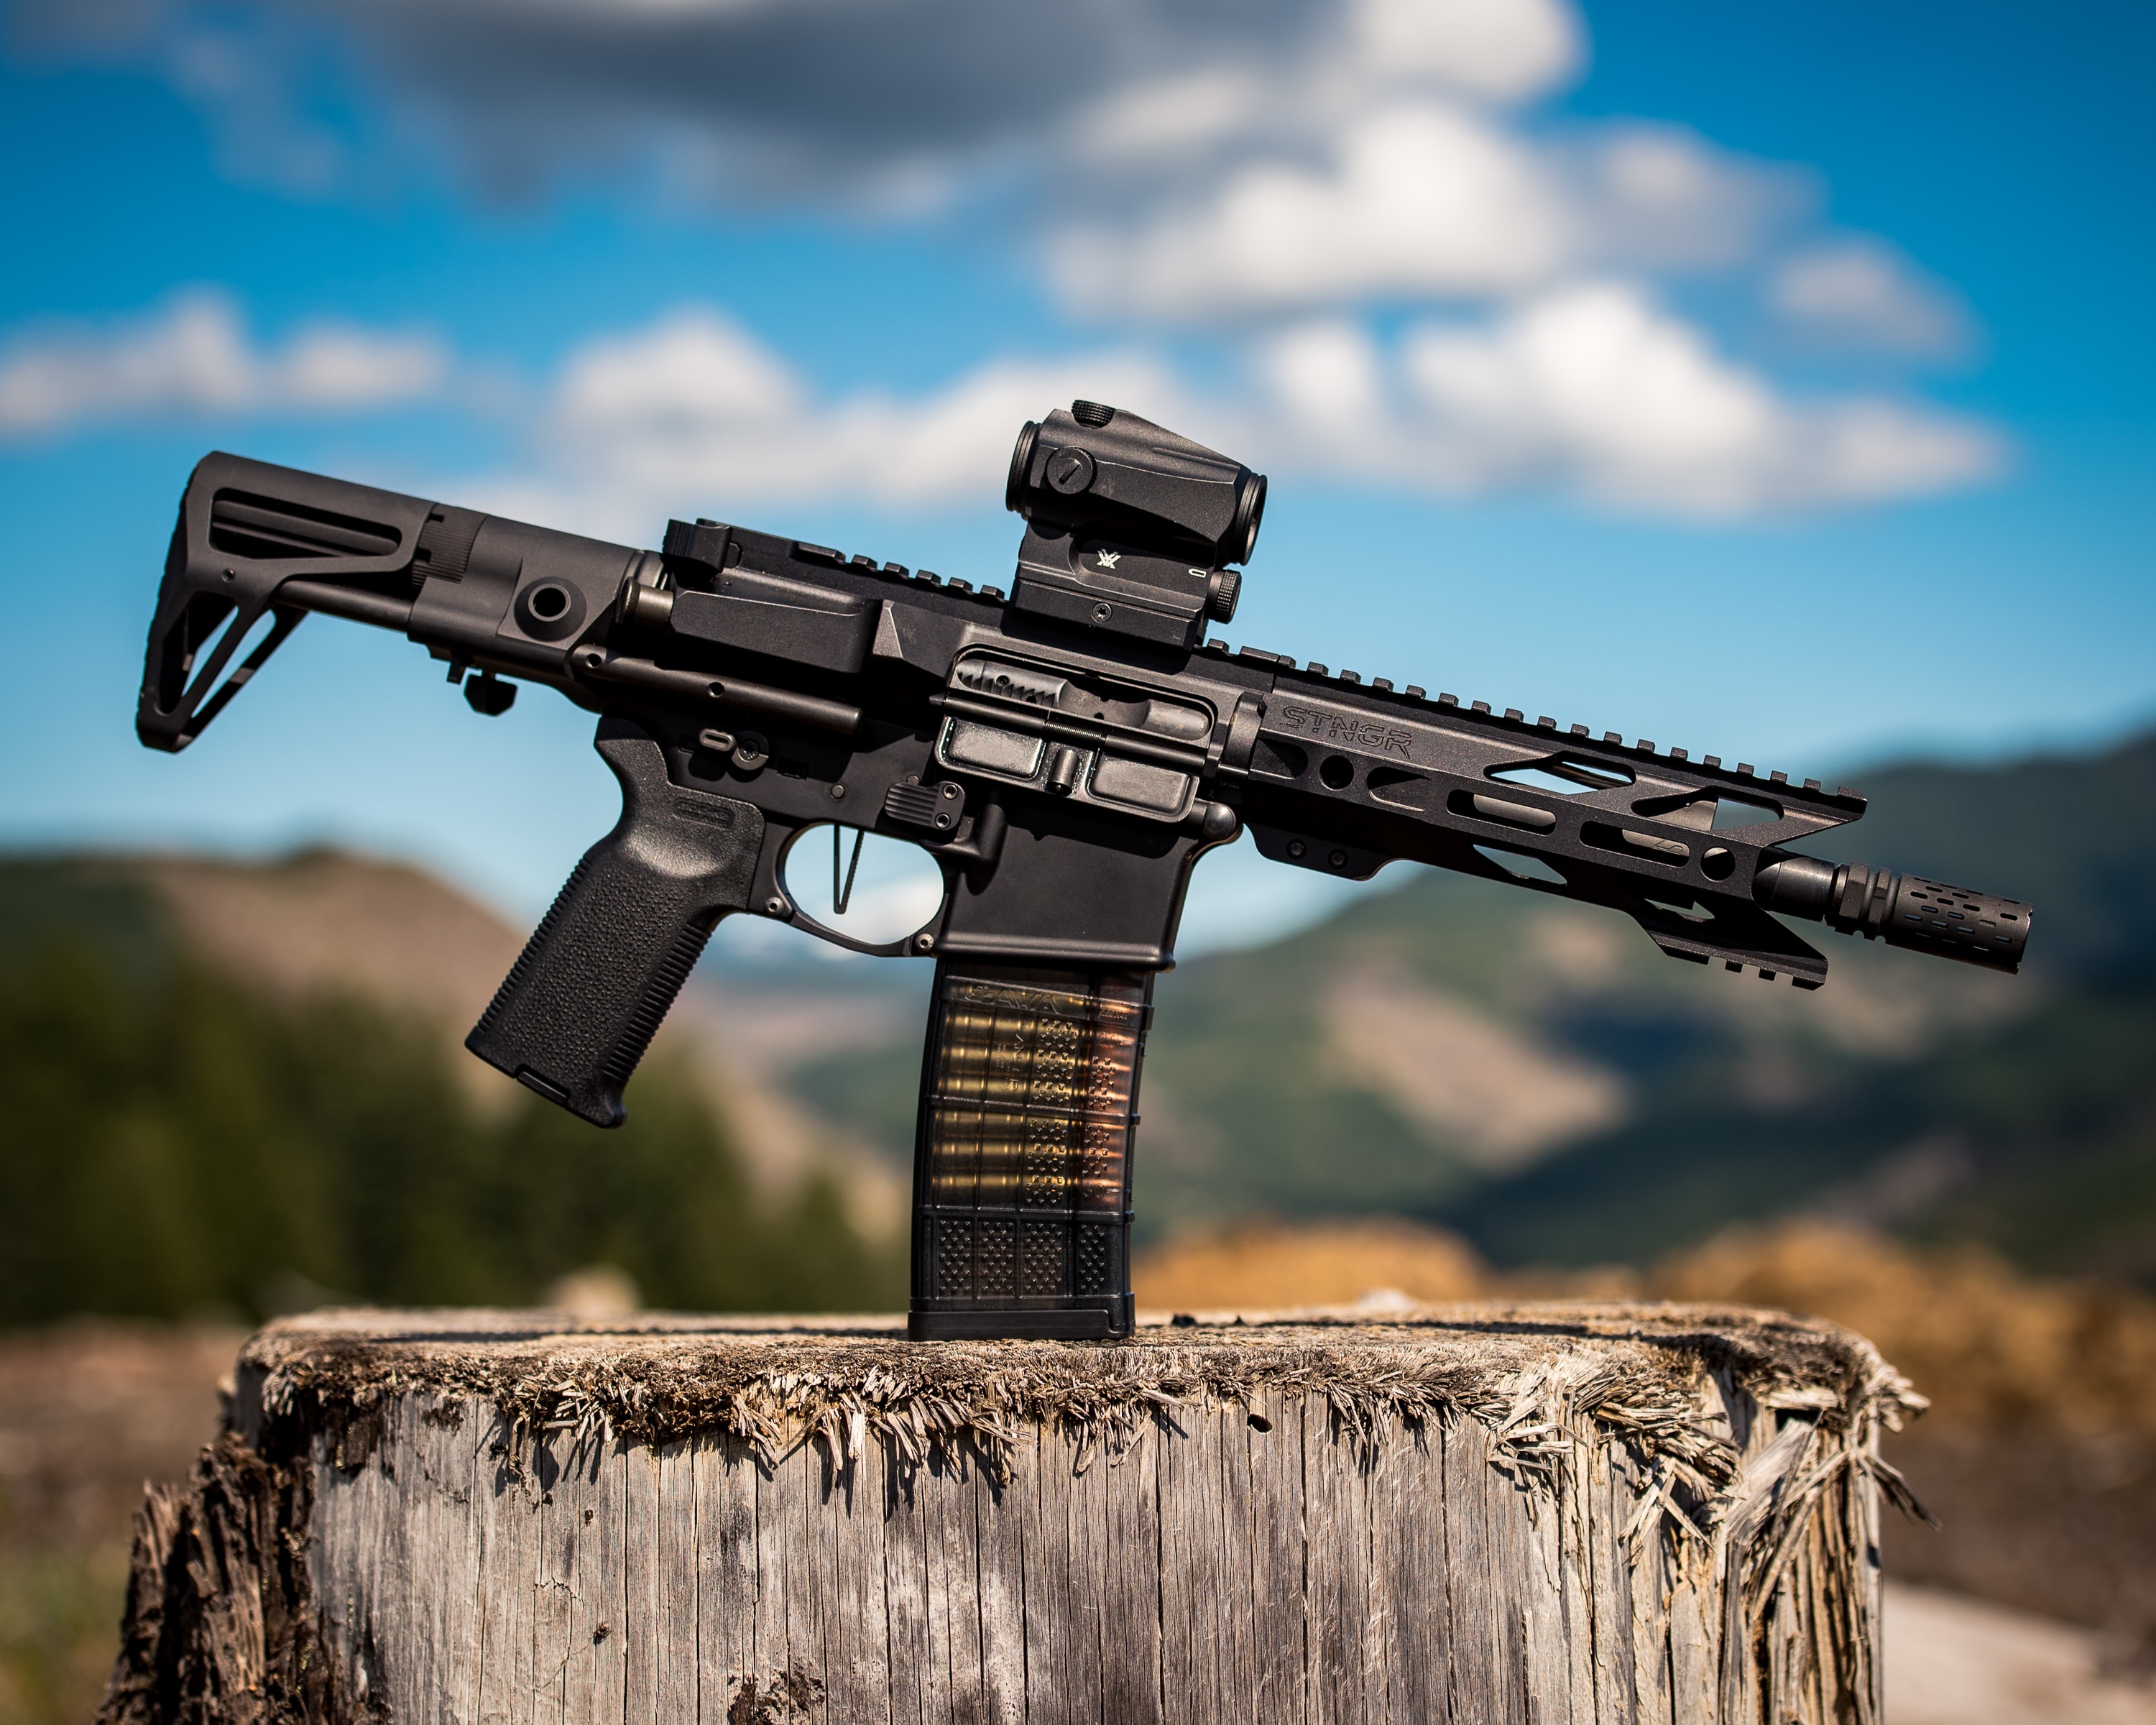
Photo by STNGR Industries on Unsplash
TYPES OF RIFLE SCOPES
There are different categories for rifle scopes or sights. Depending on what you need them for, some are just better than others. For example, if you’re looking for a scope that you can use for close to medium range, you certainly won't be getting a telescopic scope with 60x magnification. You may not be able to focus on close targets, and you’ll be paying extra for magnification power that you’ll probably never use.
To help you decide on what type of scope to look for, we will have a look at the general categories which are; iron sights, red dot sights, telescopic sights, and night vision (including thermal imaging). Iron Sights
Iron sights are the stock sights provided straight from the factory. However, not all rifles come equipped with them. They usually come in a pair with one located at the back, and the other at the front (near the muzzle). To aim using an iron sight, the user will line up the center of the back sight with the front sight. The rear sight is available in two different configurations; open or aperture. In an open configuration, the rear sight is shaped like a notch. For an aperture configuration, the rear sight is a small hole. Traditional iron sights are usually fixed, but newer ones have the ability to adjust either the windage or elevation.
Red Dot Sights
A red dot scope comes in two variations; tube and reflex. Let's start with tube red dots. A tube red dot works by projecting a reticle (in the form of an illuminated red dot) onto a glass surface using an LED that stays aligned with the rifle to minimize parallax. They can easily be identified by their tube design that protects the inside of the sight from external environments, just like the Bushnell Trophy Red Dot TRS 1x25 Matte Rifle Scope. However, this design also limits the field of view. Tube sights usually have no magnification capability, but have an extremely long battery life, since the LED that emits the reticle consumes very little power. 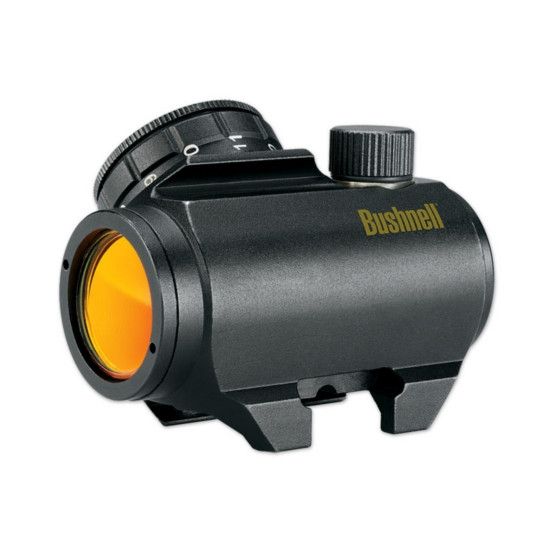
When it comes to reflex sights, they use the same principle as the tube design to display the reticle. However, since they do not use the same tube design, reflex sights have a wider field of view. One drawback of not having a tube housing is the reduced reliability when their light path is blocked by the external environment. As you can see from the design of the Vortex Viper Red Dot, they are smaller than a normal tube red dot, and can be used on some pistols. 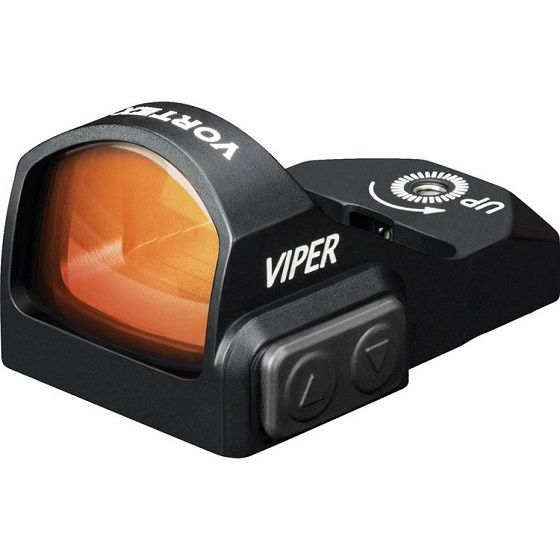
Holographic sights are not a direct variation of red dot sights, however, they are often lumped together with the red dots, since the reticle is superimposed on the sight. They work by projecting a holographic reticle on your target using a laser diode causing them to appear on the same plane as your target, unlike a standard red dot where you have to constantly change focus between the reticle and your target.
As the laser diode used in holographic sights requires more power, the battery life is significantly shorter. Holographic sights are also more expensive and bulkier than your average red dots. For someone with astigmatism, viewing through a red dot will result in a blurred or distorted reticle which is absent when using a holographic sight since the reticle is not reflected light. 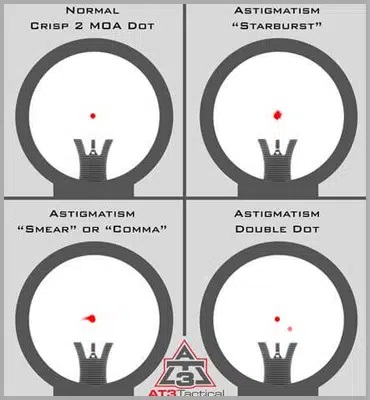 Astigmatism through a red dot [SAMPLE IMAGE]
Telescopic Sight
Telescopic or magnifying sights have the capability to magnify an image and come in either fixed or adjustable variants. They operate on the same principle as a refractor telescope with an added reticle in its optical path to provide a more accurate aim.
Fixed scopes provide a fixed magnification power. If you know the exact magnification that you need, a fixed scope is a great option since they are lighter, smaller, and cheaper compared to a variable magnification scope. There are also fewer things to fiddle with, so they are generally easier to use. A good example of a fixed scope is the Vortex VMX-3T Magnifier which provides 3x magnification. 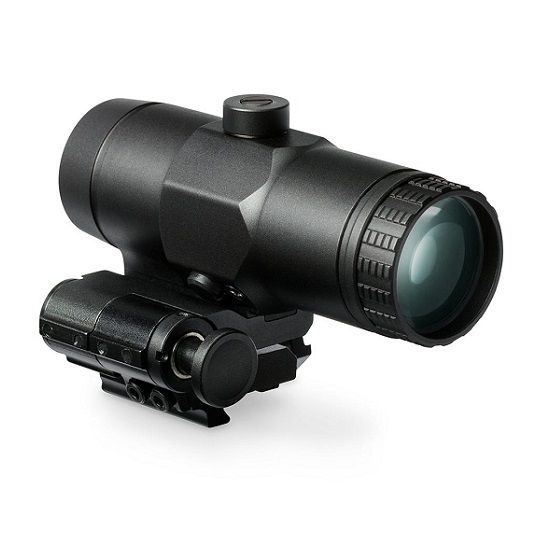
 Click here to view more scope collection Night Vision
Night vision scopes also include thermal imaging scopes. These scopes are highly situational since they function to enhance images in certain lighting conditions. Because of this, they are available either as a dedicated scope or as a clip-on that you can attach to your normal telescopic sight.
Night vision scopes allow you to see in the dark. However, they still require a small amount of ambient light to work. This is because they function by boosting the near infrared ambient light in the environment using an image intensifier. If no ambient light is available, a normal night vision scope will not work. Because of this, most night vision will come with an IR illuminator that acts as a flashlight for the scope. An example of a night vision scope with an IR illuminator is the Yukon Sightline N475 Night Vision Rifle Scope. Night vision scopes are typically more expensive than your average scope, but still relatively cheaper compared to a thermal imaging scope. One advantage of a night vision scope compared to a thermal scope is that they can provide a clearer and more detailed picture of the target and its surroundings. 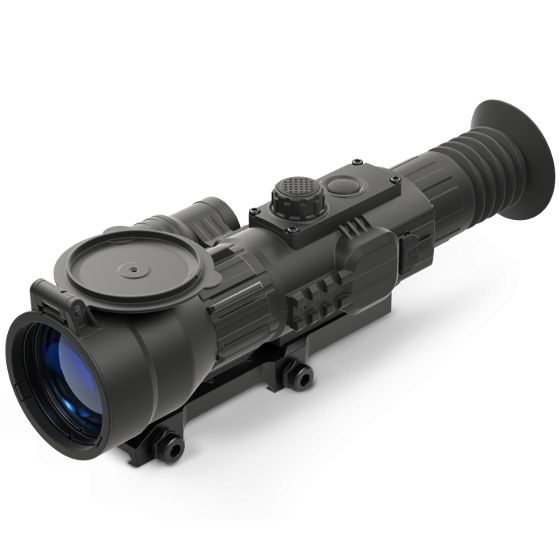
Thermal imaging works by capturing a higher spectrum of infrared light using an infrared scanner and converts them into an image using a complex algorithm. Unlike night vision scopes, they do not require any ambient light to work and can even display images through smoke and debris which makes them more versatile. A good example of a high-quality thermal imaging scope is the Pulsar Trail LRF XQ38 Thermal Imaging Rifle Scope. Images produced by the thermal imaging scopes are not as detailed as a near infrared night vision scope which makes identifying targets much harder. Thermal imaging scopes can be expensive depending on their resolution, heat sensitivity, detection range, and additional features. 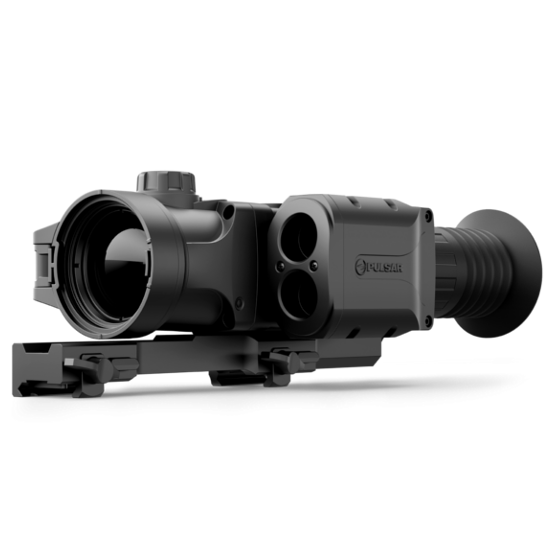
MAGNIFICATION
Before we go further into the specifications of a rifle scope, we need to talk about how to identify a scope’s magnification range. Magnification is the ability of the scope to enlarge an image compared to seeing them with the naked eye. For example, a scope with 9x magnification power enlarges an image by nine times.
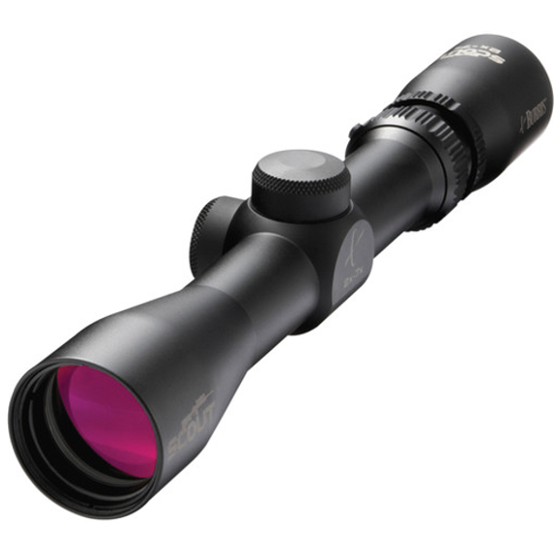
The Burris Scout 2-7x32 Rifle Scope has a 7x maximum magnification Another thing that should be noted when it comes to magnification is that higher is not necessarily better. When using more magnification power, the image you see will have a reduced field of view and brightness compared to lower magnification, and will also be more sensitive to movement. For hunting, a standard magnification power should range between 3-9x. OBJECTIVE LENS
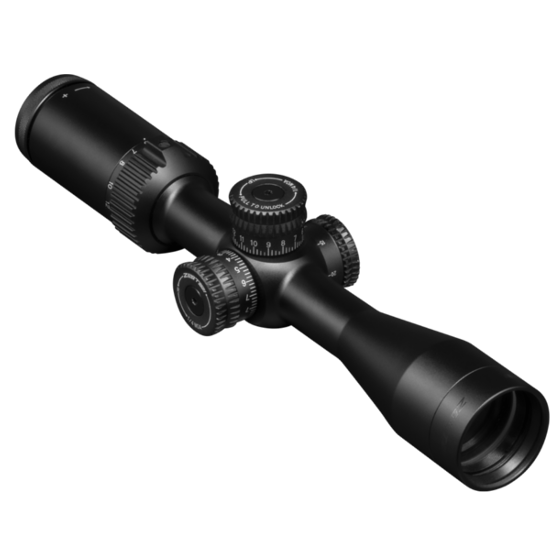
Now let’s move on to the objective lens. The objective lens is the front lens (furthest from your eye) and its diameter size (in mm) can be identified through the name of the scope just like magnification. For example, the Vortex Crossfire II 3-9x40 V-Plex Rifle Scope has a magnification range of 3-9x and an objective lens size of 40mm. The number stated after the “x” is the objective lens diameter.
The objective lens is important because it relates to the image clarity and brightness that the scope can achieve. A scope with a larger objective lens will have better image clarity and brightness at the cost of being bulkier. The medium size for an objective lens would be 30-44mm which is suitable for hunting.
Depending on the manufacturer, the objective lens of a rifle scope will have some kind of coating on the surface to produce a better image. The types of coatings available are:
A coated surface of the lens will always produce a better image than those that are uncoated. However, the more coatings that are applied, the greater the cost, with fully multi-coated being reserved for top-quality scopes.
Parallax in rifle scopes is a phenomenon where the reticle seems to be floating or moving around when you’re looking around through your scope which can lead to a missed shot since the reticle is not aligned to your target. When shooting under 230m, parallax is not something to be concerned about, since most close and mid range scopes have fixed paralax for their intended range.. Beyond that range, parallax will start to kick in and may potentially ruin your shot. To prevent this from happening, most long range rifle scopes will come with a parallax adjustment turret or an adjustable objective ring. Even though most scopes are factory set to withstand parallax at a certain range, it is something to keep in mind especially when you’re planning to take on a long-range shot. WINDAGE AND ELEVATION TURRETS
To adjust to the shooter’s eye, all rifle scopes will have an adjustment knob for windage (horizontal) and elevation (vertical). They are located midway on a scope and can get loose over time due to recoil. The function of these turrets is to help you zero your aim before shooting and they are calculated in either Milliradian (MRAD) or Minute Of Angle (MOA).
Some indications of good turrets are the audible click sound that can be heard every time you move the knob to help you get a better feel for the adjustment you’re making without having your eye leave the scope. Another sign is the repeatability of the turrets; a good turret must be able to consistently retain the adjustments you have made previously.
EYE RELIEF
Eye relief is the distance away from the eyepiece that your eye must be to get a clear picture. This is an important criterion, since sufficient eye relief will prevent the recoil of the gun from hitting your face. A standard eye relief distance for most rifle scopes nowadays is around 4 inches which is enough for most rifles. However, if you feel your recoil is slightly stronger, you can always go for a scope with more eye relief. |